
![[DIY-Cable] HMI “FujiHakko” Programing Cable](https://plcjournal.com/wp-content/uploads/2023/09/DIY-Cable-HMI-FujiHakko-Programing-Cable.png "[DIY-Cable] HMI “FujiHakko” Programing Cable")
Connecting Fuji/Hakko HMI to PC via RS232 Port: A Step-by-Step Guide
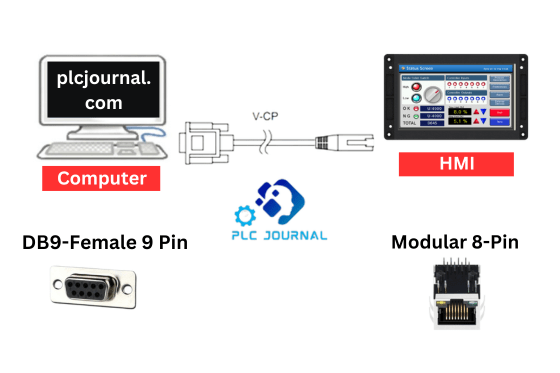
In today’s technological era, human-machine interfaces (HMIs) play a pivotal role in industrial automation. Furthermore, Fuji and Hakko, renowned for their high-quality HMI products, offer a wide range of devices suitable for various applications. To fully harness the potential of these HMIs. It is often essential to connect them to a PC via an RS232 port. Therefore, in this guide, we will walk you step by step through the process of making an RS232 cable for Fuji/Hakko HMIs. Furthermore, this can be effectively applied to UG220, UG330, V4, V6, V7, and V8 Series devices, thereby ensuring compatibility across a wide range of HMI models and enhancing overall system flexibility.
Why Connect Your HMI to a PC?
Before diving into the technical details, let’s understand the significance of connecting your Fuji/Hakko HMI to a PC. This connection provides several advantages:
- Data Transfer: By connecting your HMI to a PC, you enable seamless data transfer. Consequently, you can easily upload and download project files, configurations, and data logs. Which, in turn, makes it much easier to monitor, manage, and control your automation system effectively.
- Remote Access: Once the HMI is connected to your PC. You can not only remotely monitor but also control your industrial processes. As a result, this significantly enhances efficiency, minimizes downtime, and allows for quicker responses to any issues that may arise.
- Real-time Monitoring: By enabling real-time data monitoring, you can quickly access up-to-date information. Consequently, this allows you to make informed decisions, identify potential issues early, and troubleshoot problems promptly. Furthermore, it helps improve overall system efficiency and ensures more reliable operations. Moreover, this capability helps improve overall system efficiency and reliability.
- Programming and Configuration: By first connecting your HMI to a PC, you can conveniently program and configure it. As a result, this not only streamlines the entire customization process but also allows for quicker adjustments, easier updates, and more efficient overall management of your system.Furthermore, this connection allows for quicker adjustments, easier updates, and more efficient overall management of your system.
Making the RS232 Cable
Now, let’s proceed with creating the RS232 cable to connect your Fuji/Hakko HMI to your PC. Before getting started, make sure you have gathered all the necessary materials, so that the process can be completed smoothly and efficiently.
- DB9 Male Connector
- RJ45 Connector
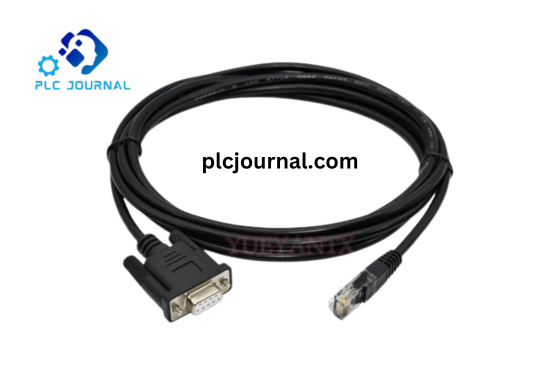
- RS232 Cable (with DB9 Female Connector on one end)
- Soldering Iron and Solder
- Wire Strippers
- Multimeter (for testing continuity)
Steps to Create the RS232 Cable:
- Prepare the RS232 Cable: If your RS232 cable has a DB9 female connector on one end, cut off the other end. Strip the outer insulation to reveal the inner wires.
- Identify the Wires: Inside the RS232 cable, you will typically find wires in various colors. Specifically, the key wires to identify are Tx (Transmit), Rx (Receive), and GND (Ground). To ensure accuracy, use a multimeter to determine the corresponding pins on the DB9 female connector before proceeding to the next step.
- Solder the Connections:
- Connect the Tx wire (usually white) to Pin 2 (Transmit) on the DB9 connector.
- Next, identify the Rx wire, which is usually black, and then carefully connect it to Pin 3 (Receive) on the DB9 connector. By following this step, you ensure proper data reception, which is essential for the reliable functioning of your connection.
- First, identify the GND wire, which is usually green, and then carefully connect it to Pin 5 (Ground) on the DB9 connector. By doing this correctly, you ensure a proper grounding connection, which is crucial for the safe and reliable operation of your system.
- Prepare the RJ45 Connector: Strip the outer insulation of the RJ45 connector’s cable to expose the inner wires. Typically, you will find eight wires, but you’ll only need three.
Solder the Connections:
- Testing: Once you have finished soldering the connections, use a multimeter to carefully test the continuity of each connection. This step is essential to ensure that there are no short circuits or open circuits, and consequently, that the cable will function correctly and reliably.
With the RS232 cable now fully assembled, you can confidently connect your Fuji/Hakko HMI to your PC. Moreover, by carefully following the provided connection diagram for your specific HMI model, you will be well-prepared to unlock the full potential of your industrial automation system and maximize its efficiency.
In conclusion, establishing a connection between your Fuji/Hakko HMI and PC via an RS232 cable is a valuable step in enhancing your industrial automation capabilities. This guide has carefully walked you through the entire process of creating the cable. Consequently, with the correct connections in place, you can now enjoy enhanced data transfer, seamless remote access, real-time monitoring, and more efficient programming for your HMI devices. Furthermore, these improvements will help streamline your workflow and optimize overall system performance.
Technical Guides
What Is a Programmable Logic Controller (PLC)? Full Explanation
What is HMI? Human-Machine Interface (HMI)-Full Explanation
What is a Variable Frequency Drive?-It’s complete guidelines
What Is a Servo drive and How Does it Work? It’s complete guidelines
Manual PDF
[PDF] Delta PLC DVP-ES2/EX2/SS2/SA2/SX2/SE&TP Operation Manual Free Download
Delta HMI-DOPSoft User Manual Free Download [PDF]
Cable Making
[DIY-Cable] PLC/HMI-Panasonic Connecting PC
[DIY-Cable] PLC/HMI-Keyence Connecting PC
[DIY-Cable] S7-200 Siemens Connecting PC
[DIY-Cable] Mitsubishi PLC Programming Cable SC-09 for FX-Series
[DIY-Cable] PLC Delta Programming Cable DVPACAB230
[DIY-Cable] PLC OMRON Programing Cable for CJ/CS/CQ-Series
[DIY-Cable] PLC “LS/LG” Programing Cable
[DIY-Cable] PLC “Fatek/Facon” Programing Cable
[DIY-Cable] PLC “Vigor” Programing Cable
[DIY-Cable] HMI “Fuji/Hakko” Programing Cable
[DIY-Cable] “HMI Omron NT-Series” Programing Cable
[DIY-Cable] HMI Keyence “VT3-W4 Series” Cable Connecting To PLC
[PDF] HMI-Weintek Connection PLC Guide


